Art & Maker Wednesday: Carton Conveyor Belt
Today we’re going to make a conveyor belt out of a recycled juice or milk carton. A conveyor belt is a machine that transports objects from one place to another. If you’ve visited CMA before, you probably used our conveyor belt to unload boxes from the delivery truck! Conveyor belts are made up of two simple machines: pulleys and axles.
Materials & Instructions
Empty milk or juice carton (1 or 1.8 quart size carton)
Tape
2 pencils or pens
3 sheets of paper
Scissors
Ruler
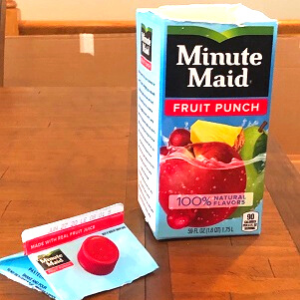
STEP 1. Rinse out your empty carton.
STEP 2. Cut the top off your carton. Parents, if you poke a hole in the carton with adult scissors, the rest can be cut using child safety scissors. Once you’ve cut the top off, dry the inside of your carton with a towel.
STEP 3. Cut off two opposite sides of your carton so that you have two opposite sides remaining.
STEP 2 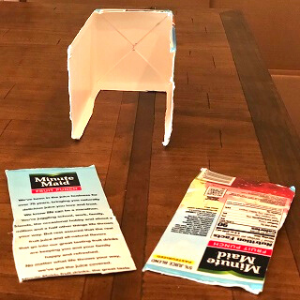
STEP 3
STEP 4. Next, poke holes in the right and left sides of your carton to hold your pencils or pens, which will act as the arms of your conveyor belt. We used a sharp pencil to poke the holes. The holes should be approximately one inch in and one inch down from the top of your carton. Your pencil or pen will need to go through one side of the carton and out the other side.
STEP 4 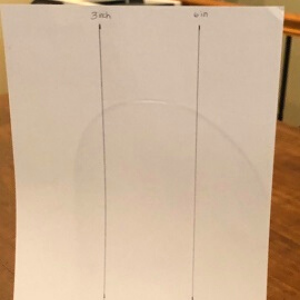
STEP 5
STEP 5. Now it’s time to measure. Position your paper so that the short side is on top and the long side is on the side. Take your ruler and make a mark at the top of your paper that is three inches from the side. Make another mark that is six inches from the side. Make the same marks at the bottom of your paper, then use your ruler to draw two straight lines connected the top dots to the bottom dots.
STEP 6. Repeat Step 5 on your second piece of paper.
STEP 7. Now use your scissors and cut along the lines on both sheets of paper. You will end up with four 3-inch pieces of paper and two 2-inch pieces of paper. Put the 2-inch pieces of paper to the side; you can use those to make items for your conveyor belt later.
STEP 7 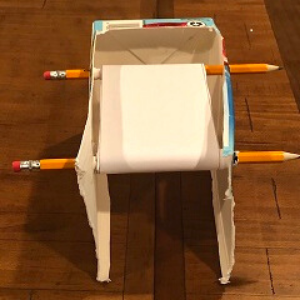
STEP 9
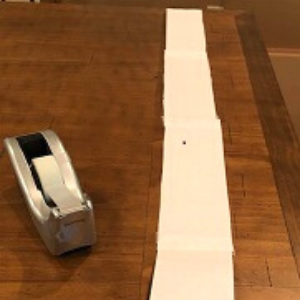
STEP 8. Tape your four 3-inch pieces of paper together to create the belt for your conveyor belt. Overlap the paper by an inch and tape it on the front and the back. You should end up with a very long piece of paper that is three inches wide.
STEP 9. For your final step, tape one end of your paper to one of your pencils or pens. Make sure to tape it securely along with the entire pencil or pen! Roll the paper up about a quarter of the way onto the first pencil, then tape the other end of the paper to the second pencil or pen and roll that one up about a quarter of the way.
Your conveyor belt is ready to roll; twist the pencils and see what happens!
Vocab Words
Conveyor: A person or thing that transports, or carries, something else.
Axle: A rod that goes through the middle of a wheel. In our conveyor belt, our pencils are our axles.
Pulley: A wheel that has a cord around it. Pulleys are typically used to carry heavy things. In our case, our pencil with the paper over it acts as a pulley to carry items across. Can you make boxes out of your leftover paper to carry on your new conveyor belt?
RECENT POSTS